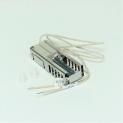
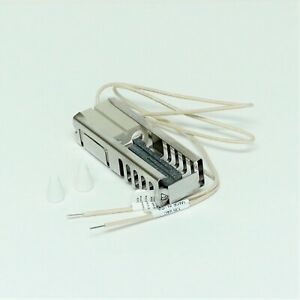
Sale! 41-205 for Frigidaire 316489402 Gas Range Oven Ignitor PS1528536 AP3963555
SaveSavedRemoved 0
Deal Score0
Deal Score0
User reviews
Good, I have broke one b4. Handle them extremely gently and do not touch the sensitive element. Do not jar it, easy does it.. I cut my wires a little too short, make sure you give yourself enough length , and lastly, pull on your wire nuts to make sure the wire is holding good on those ceramic nuts. Think it through and take your time.
This is a gas oven igniter that I purchased to replace a failing igniter in a Maytag oven range. The build of this igniter as compared to the original seen pretty much identical, and it works like a charm once installed. Swapping out the old one for this new one is quite simple, which I will detail here. First and most important step: UNPLUG the oven! After that, you simply remove all of the racks from the oven, then undo and remove the oven's floor (it may be screwed down), which gives you access to the gas burner assembly.. Typically these igniters are held on by two screws that hold the igniter close to the gas burner; you really can't miss it. PRO TIP: It makes disassembly easier if you take off the oven door. It's quite easy to do on these models, simply open the door about 4 inches, and then pull straight up. The door will slide off of its hinges, no unbolting of screws needed. Once you locate the old igniter, simply unbolt it and pull it away from the burner, pulling the wires a few inches out of the back wall of the oven. After that, just snip the wires off of the old igniter (cut close to the old igniter body) and then strip a little bit of insulation off of the old wires. You then use the included ceramic wire nuts to connect the ends of the wires from the new igniter to ends of the old igniter's wires. It doesn't matter which wires you connect, so long as you are connecting an old wire to a new wire within each wire nut. After that, you tuck the excess wire out of the way behind the back wall of the oven, and then bolt the new igniter back onto the burner assembly. Then you put your oven back together by replacing the floor of the oven, the racks, and the door.. If you did everything correctly, after plugging the oven back in and turning on the oven, you should see the igniter start to glow and hear a flame come on in about 20 seconds. I've purchased a few of these igniters and each time it's a straightforward repair that takes less than 15 minutes.
I used it to replace a slightly different version and it worked perfectly. As long as the ratings are the same and the leads (wires) are long enough it's fine. Go to the Robert Shaw site to compare. The mounting holes were slightly different but I made it work without any drilling etc. The oven I was working on had been hacked before and so nothing was original. Be sure the ignitor is mounted so that it's not going to get banged into (they are fragile) and it's close enough to the burner element. If your oven goes "whoosh" when it lights the ignitor may be too far from the burner element. Most of the time you can simply bend the mount slightly to adjust. Being too far from the burner causes premature failure. The NLA Caloric part was almost $100 this was less than $20...